Arborists and Landscape Professionals Directory Guide
How to complete the application form:
Step 1: Enter the first and last name of the primary contact for your business.
Step 2: Enter the primary contact’s phone number. This number will not be displayed in the directory but will be used by BHCP staff to contact you. Later in the form, you can enter a separate business phone number, if applicable.
Step 3: Enter the email address for the primary contact at your business. Later in the form, you can enter an email address for your business’s general inbox, if applicable.
Step 4: Create a password that you can use to log in and change your profile in the future.

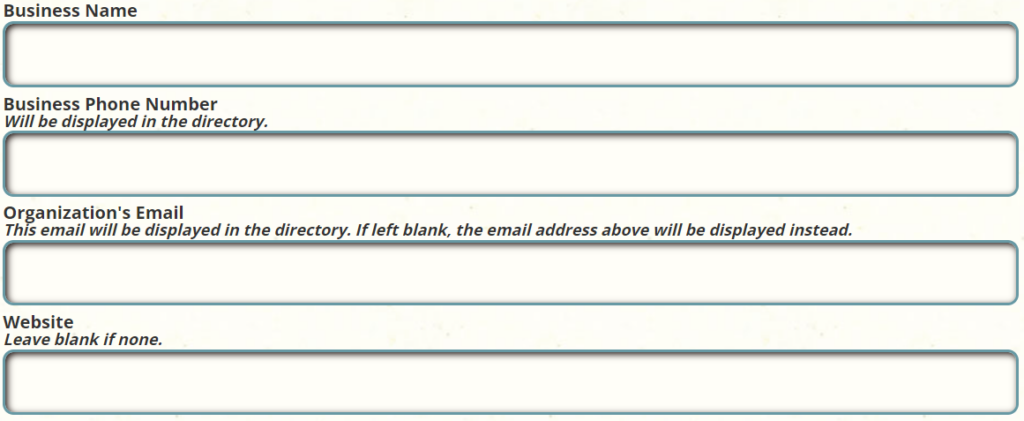
Step 5: Enter the business name as you want it displayed in the directory.
Step 6: Enter the phone number that you want displayed in the directory, if any. NOTE: We suggest the 987-654-3210 format.
Step 7: This email address will be shown in the directory. Enter your business’s generic email address (Ex.: info@ColumbiaLandTrust.org) or leave the field blank if you want the primary contact’s email address entered in Step 2 to be displayed in the directory.
Step 8: Enter the business’ website, if any. NOTE: Leave it blank if none.
Step 9: Select the services that your business provides. NOTE: Select all that apply.
Step 10: Select the counties in which your business operates. NOTE: Select all that apply.
Step 11: Select the state licenses that the business has. NOTE: Select all that apply.
Step 12: Select if the business is owned by a person or people of color.
Step 13: Select if the business has experience creating accessible spaces for disabled people.

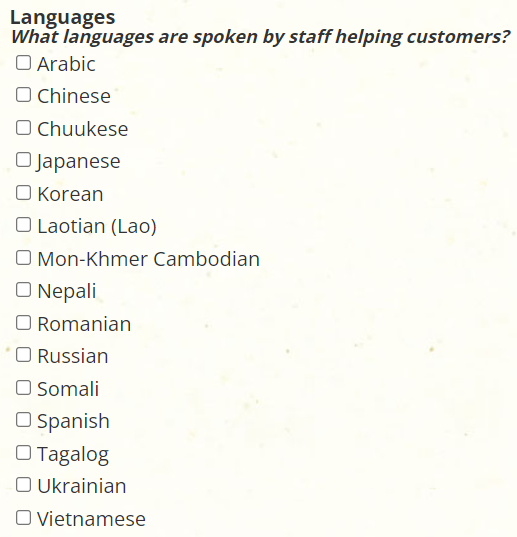
Step 14: Select all the languages spoken by staff. NOTE: Select all that apply.
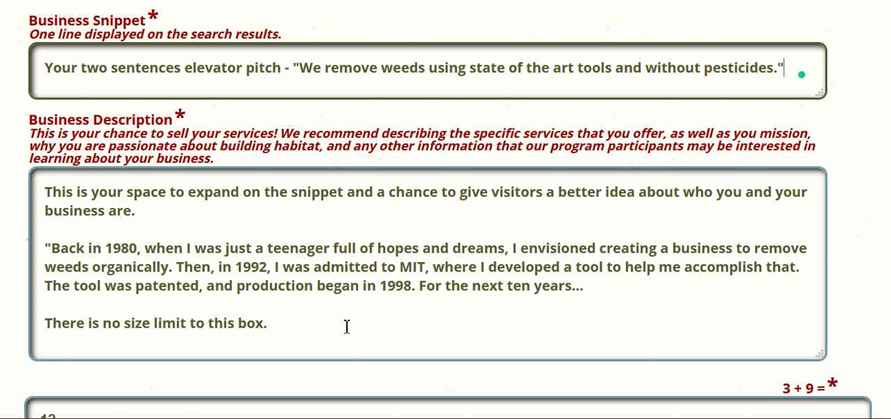
Step 15: Write a sentence or two about your business in the Snippet field. NOTE: This snippet appears on the front page of the directory.
Step 16: Write a detailed description of your business. We recommend including any specific type of services you provide and any projects you specialize in. Here is the place to mention any licenses. NOTE: People will see this description by clicking your business hyperlink.
Step 17: Answer the math test. NOTE: This is an anti-spam feature to ensure you are not a bot.
Step 18: Submit the form.
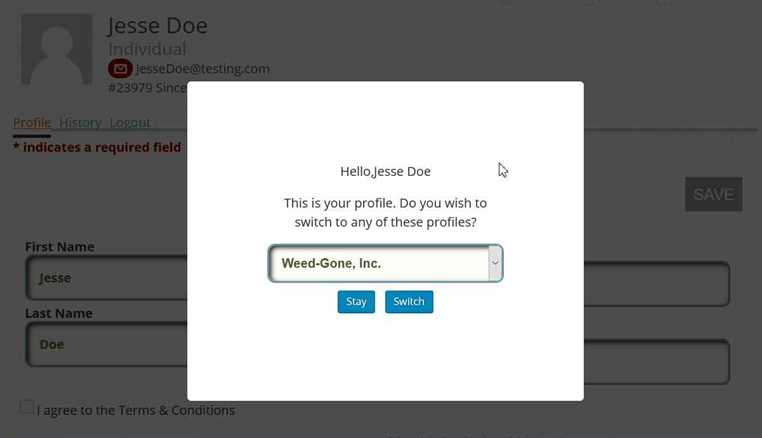
Step 19: Wait 15 to 30 seconds while your account is created. You will be automatically redirected.
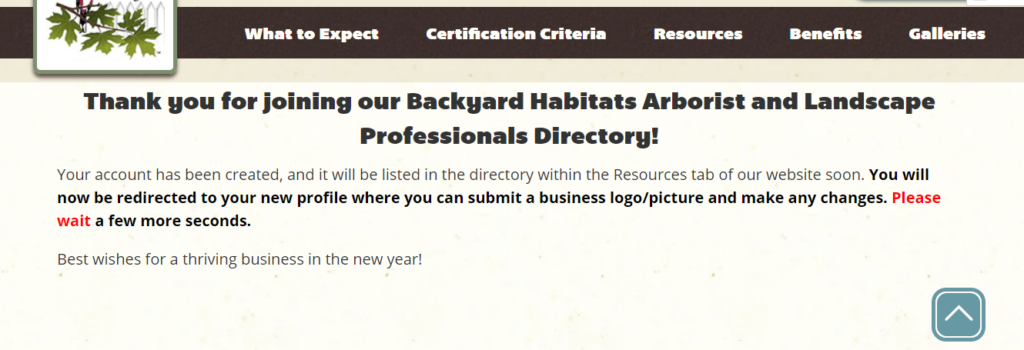
Step 20: Click the “Switch” button to access your business profile. NOTE: Clicking on “Stay” will open your personal profile. More on that later.
You are done, and you may close the browser! Your business information will be added to our directory in early January.
OPTIONAL: Adding a Logo / Photo
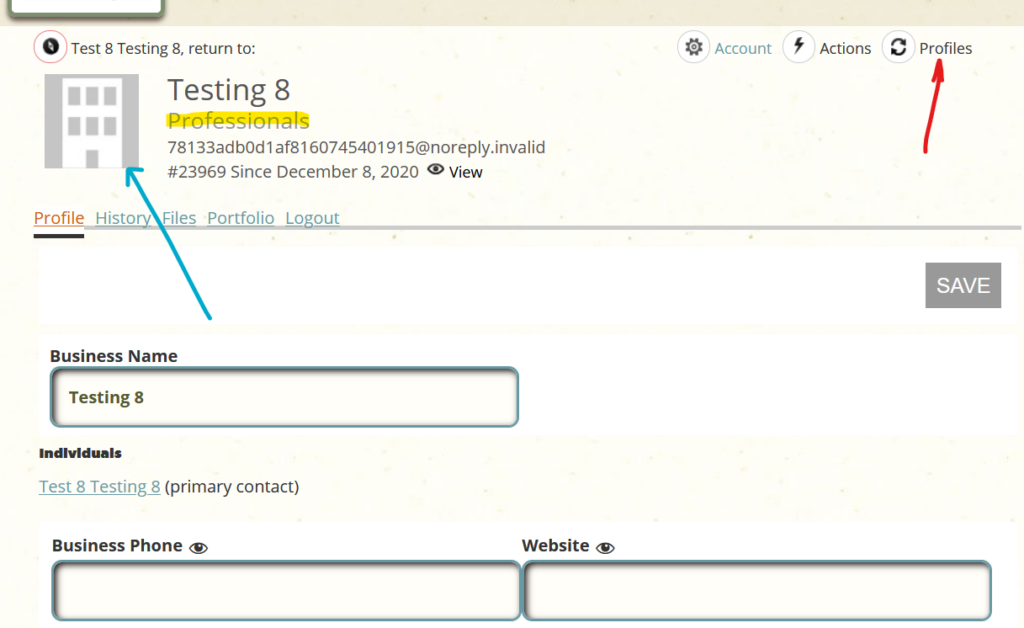
This is what your Professional profile looks like. From here, you can change any business information submitted via the form. To change your personal information, click the “Profiles” button in the top right corner, then select your name. NOTE: Always save the changes by clicking the blue “Save” button.
To add a business logo/picture:
NOTE: Only upload square JPG and PNG image files (PDF or TIFF files will not work). If your logo is round, oval, or rectangular, make sure the canvas is square (transparent or white background).
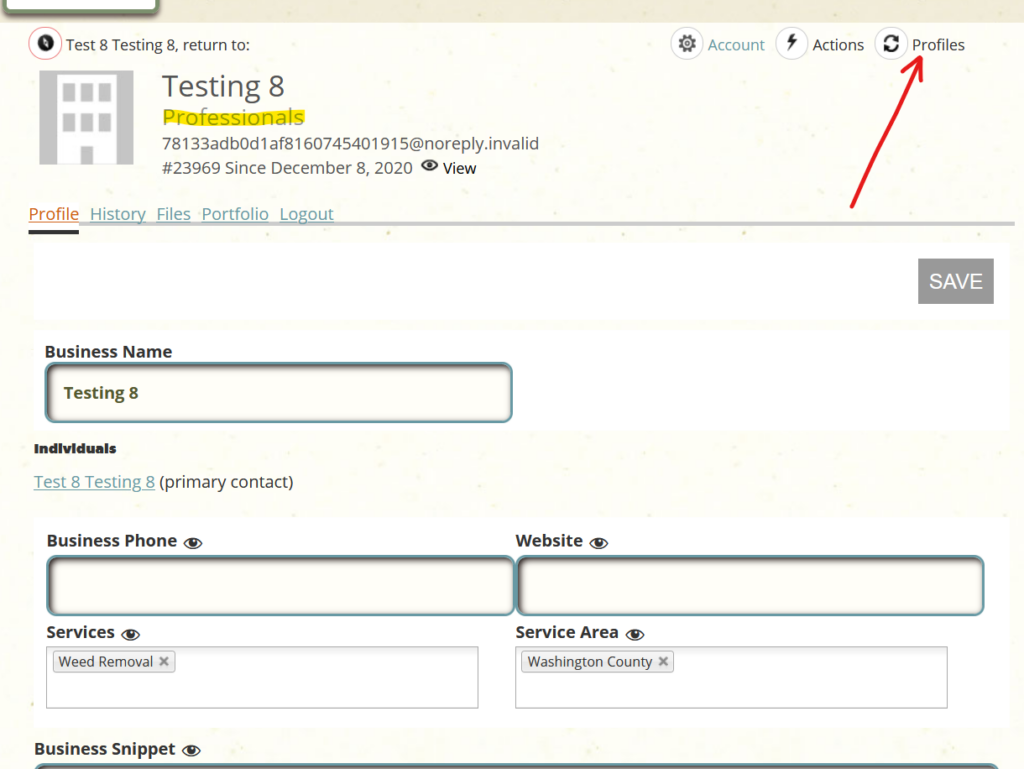
Step 1: Click on the image next to the business name in the header.
Step 2: Click the Browse button on the box that opens on the screen’s right side to upload a picture from your computer. NOTE: You can leave the Title, Date, and Notes fields blank/unchanged.
Step 3: Click the Save button.

Logging Back In
You can change any of the information for your business, as well as the picture/logo, and portfolio images.
Step 1: Go to https://backyardhabitats.org/paupress/profile
Step 2: Log in using the email address and password you submitted in the form.
Step 3: Choose the “Switch” option to go to your Professional profile. NOTE: You can switch between your personal/individual and professional profiles by simply clicking on the “Profiles” button. NOTE 2: The eye symbol next to each field allows you to display or hide that field from the public. Click on the eye symbol to hide/show the field, then click the Save button.

OPTIONAL: Adding Portfolio Images
To display samples of your work in your business profile:
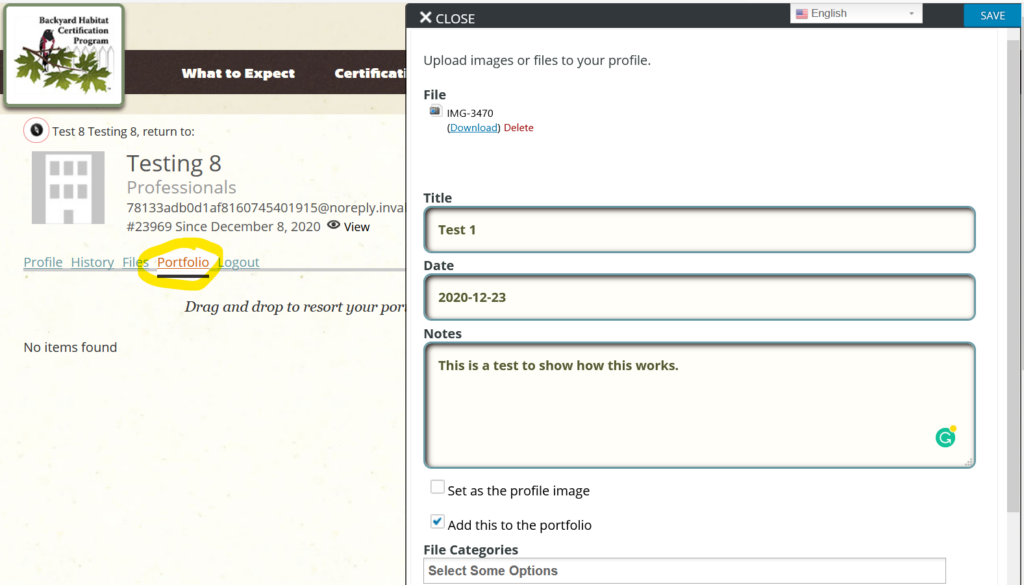
Step 1: Click on the Portfolio tab.
Step 2: Click on the Add Image or File button.
Step 3: Click the Browse button.
Step 4: Find the image file (JPG or PNG) you want to upload.
Step 5: Give the file a title.
Step 6: Add any notes about the image. NOTE: Clicking the “Set as Profile Image” checkbox will make the image your directory image.
Step 7: Click the “Add this to the portfolio” checkbox. NOTE: Clicking on the image lets you see/edit its information. You can delete the image from here or hide it from the portfolio by unchecking that checkbox.
Step 8: Click the “Save” button.
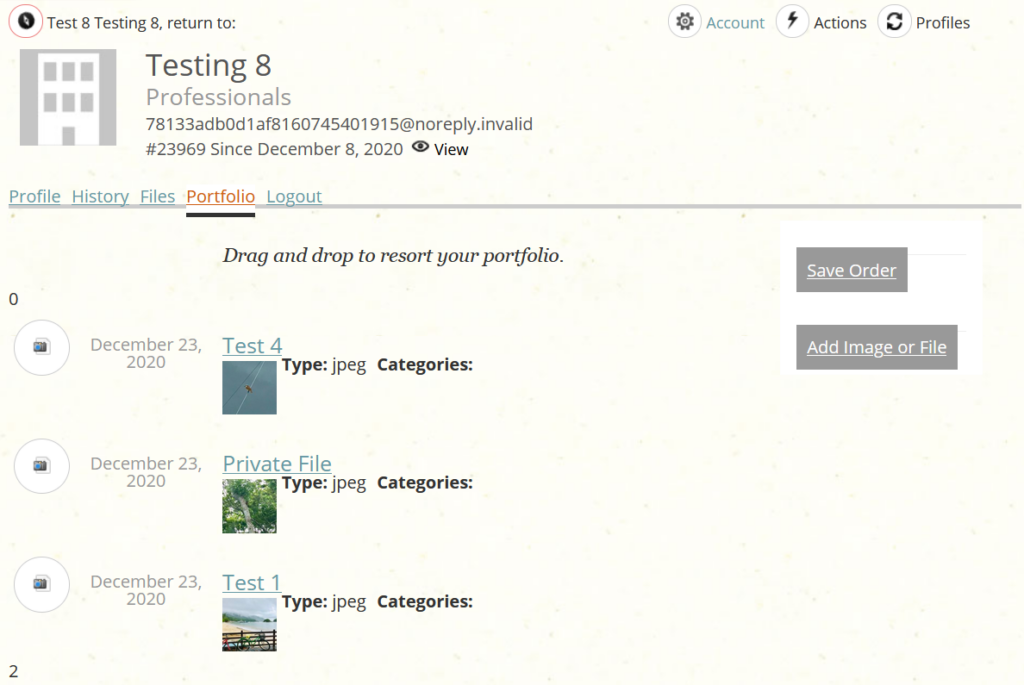
NOTE: You can change the order of the pictures by dragging them up and down. Then, you can save their order by clicking the “Save Order” button.
Removing Yourself From The Directory
If you need to be removed from the directory, either temporarily or permanently, you can contact the BHCP team or do it yourself.
Step 1: On your Professional profile, click on Account in the top right corner.

Step 2: Uncheck the “Show Publicly” checkbox on the slide-out window.
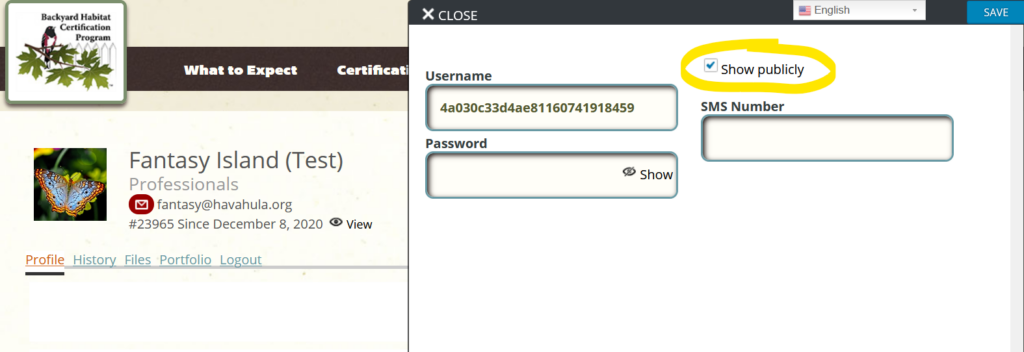
Step 3: Save your edit.